
The very famous accounting software, QuickBooks, is always a savior for businesses nowadays. It offers a very wide range of features that not only do what it says but delivers much more. One such feature allows you to set up your system on a whole network or a single server as well. Setting up on a whole network means accessing the software on QuickBooks multi user mode. This means you can share QuickBooks data to multiple computer systems if you set up QuickBooks multi user.
This whole article revolves around the detailed guide to QuickBooks pro multi user. Stick to the blog to know everything you should know about QuickBooks desktop multi user.
What Is QuickBooks Multi User Mode?
QuickBooks is widely known for the vast features it allows. We have already talked about multi user mode QuickBooks being one of them. Let’s get to know what it actually means!
Well for starters, QuickBooks offers two modes, single user and multi user. Just as the name suggests, single user mode allows only one person to access the QuickBooks software, company file and QuickBooks data. Moreover, if any other user tries to access the data, they will get errors and will be denied access.
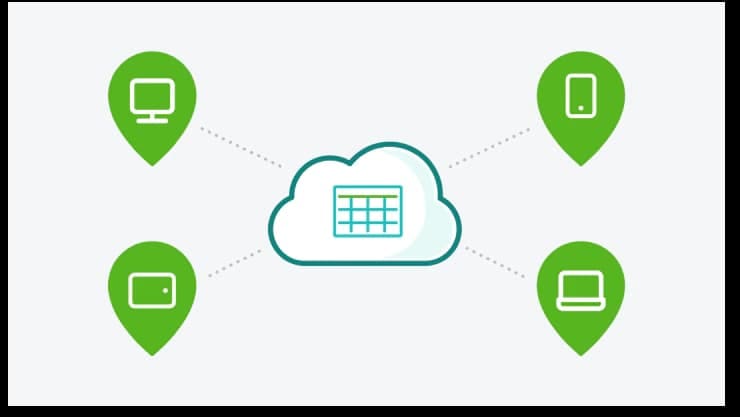
Now onto the multi user mode QuickBooks, which allows multiple, i.e. more than one users to access the software, company files and all the QuickBooks and related data. In simple words, all the systems set up over a network can easily access each other’s data on a QuickBooks multi user mode.
How Does QuickBooks Multi User Mode Work?
As already discussed, QuickBooks multi user lets more than one user to work on the same company file from their own systems. It basically connects several users with their own workstations over a single network. But how?
You own a wholesale business. There are several people working under you. Sales manager and his team, product development team, the accounting team, and a bookkeeping manager. All of these people including yourself can need access to company file at the same time or even at different intervals. However, it would be so inconvenient if each member has to access the file from a single system. This will definitely cause chaos and work delay. That’s when you use QuickBooks desktop multi user.
As soon as you launch multi user mode QuickBooks, all the employees can access QuickBooks, the company file and all the related data. Thus eliminating the havoc.
Read More - Pricing and technical features of QuickBooks Hosting Before Setting Up QuickBooks Multi User Mode
Before you start setting up multi user mode QuickBooks, you need to meet some system requirements. These are the necessities without which, QuickBooks might flash errors when switching to multi user.
- Log into the system by using Admin credentials.
- Check and verify QuickBooks Database Server Manager is activated.
- Ensure that all the computers on the server have QuickBooks properly installed.
Steps To Start With QuickBooks Multi User Mode
Now that we have all the information we need before setting up multi user mode QuickBooks, we can start with the process. This is also a reminder to ensure you’ve met all system requirements before hopping on the process. Nonetheless, there are a few prominent points you need to remember:
- At a point, you can set up to 30 users per company file in QuickBooks Enterprise Solution.
- 5 users are allowed access in QuickBooks Premier.
- The limit lowers to 3 users in QuickBooks Pro.
The main system, also known as the Host, will have company file. Whereas all the other systems (workstations) will have the software, not the company file. The host shares the company file data and any changes made are automatically synced.
Step 1: Properly Download And Install QuickBooks
The very first step is to Install QuickBooks desktop on your computer system. Follow these steps to download and install QuickBooks:
- Download QuickBooks from Intuit’s official website or from a trusted source, as you may.
- Open the .exe file and follow on-screen instructions to install it.
- After this, login using your product and license number and other details as well.
- Now, in the installation type section choose Custom & Network Install.
- Tap next and hit “I’ll be using QBs Desktop on this pc, & I’ll be storing”: full version of QuickBooks on server computer. Opt. for another option if you want server computer to host files.
- Complete the process by further following instructions on the screen.
Step 2: Accessing Permissions of The Folder
If it is not clear yet, the folder is the one containing the company file. In order to set up QuickBooks multi user mode, you need to provide accessing rights to allow it being shared over the network. Ensure you follow these instructions carefully if you want to avoid getting errors:
- Switch on your system and enter as Administrator.
- In the file explorer, look for the folder containing the company file.
- Now click right >> properties >> security.
- Hit the edit option symbolized by a pencil and select QBDataServiceUserXX. (Matching with the version of QBs you’re operating)
- Now give full control and press allow.
- Tap Apply >> Okay.
Read More - How to Configure QuickBooks Firewall Ports?Step 3: Edit The Firewall Settings
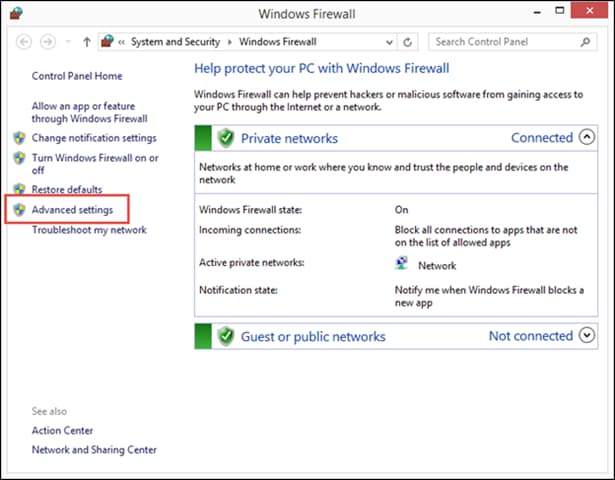
You need to ensure that all systems share files and even access files over a multi user network, and the Firewall is not acting as a blockage. To do so, users need to configure their system’s firewall and security settings. Here’s how:
- Launch the Start Menu >> Firewall >> Windows Firewall >> Advanced.
- Tap on the inbound rule tab and opt for the new rule.
- Now click on port, then next.
- Navigate to TCP options and enter ports as per current QuickBooks version.
- When you click on allow the connection, you’ll see a list. Mark all the boxes.
- Enter finish once you’ve given the rule an appropriate name.
- Repeat the same with outbound rules.
Step 4: Set up Database Server Manager
The function of QuickBooks Database Server Manager is to aid in sharing company file between different devices. Intuit provides this amazing tool that ensures a smooth sharing. You can easily download Database Server Manager on the official website of Intuit.
- In the search field, enter service.
- Now select services to open >> QuickBooksDBXX (open).
- Go to the General tab.
- Navigate to Service Status and press stop if it is running.
- Click on startup type, you’ll see a down down list.
- Select automatic >> tab logon >> local system account.
- After this, open the recovery section.
- Press restart the service for first failure, second failure, subsequent failures.
- Now again click on the General tab and select option start to restart.
Open and use QuickBooks Database Server Manager
- On the server computer, open database manager.
- Tap on scan folders >> browse.
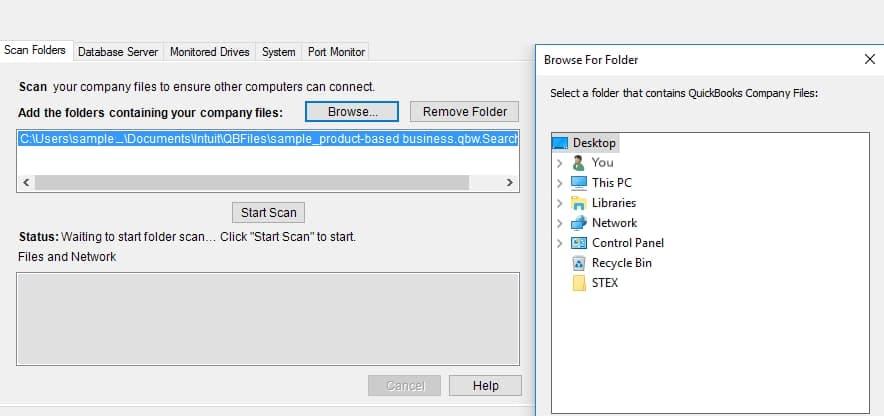
- Look for the company file and press Ok.
- After this, you tap on Monitored Drivers and mark all boxes of Hard Drive that contain the company file. This is because if you ever change the location of the company file you will not have to re-scan it.
- Now QBDSM will keep track and support sharing of the company file.
Read More - How to Use the QuickBooks Clean Install Tool?Step 5: Finally! Start Hosting
Now that you’ve finally set up everything, you are all set to turn on the Hosting mode. When you switch the Hosting mode on, QuickBooks Desktop 2022 multiple users mode is activated.
- Launch QuickBooks desktop.
- In the file menu, you’ll see the utilities option.
- Open it and choose the option host multi user access QuickBooks.
- Confirm the prompted window.
Conclusion
QuickBooks multi user mode saves a lot of headaches but can give rise to a lot of errors if all the steps are not followed properly. Therefore, make sure you carefully follow all the instructions. For better experience we recommend you get in touch with our team if any query or confusion arises. We’ll be happy to sort it all out for you.
Frequently Asked Questions (FAQs)
Q.1 – How to switch to multi user mode in QuickBooks?
Answer – When running on a single user mode, you might want to switch to multi-user. Here’s how you can do that:
- Open QuickBooks desktop.
- Go to the File menu.
- Click on Utilities and tap on Host Multi-User Access.
- Confirm it by reacting positively.
Q.2 – What is the difference between single-user mode and multi-user mode in QuickBooks?
Answer – Firstly, single-user mode and multi-user mode do exactly what the name suggests. Single user mode allows access of the QuickBooks company file only to one single user. This means when any other workstation is trying to get access to the file, it will be denied and an error might occur.
On the other hand, QuickBooks 2016 Multiuser allows access to the software and company file data to more than one user all connected on a network. Where one main computer has the company file, is the host computer, others are workstations that can access the file on the host system.
Q.3 – Can I perform a clean install if a problem occurs while setting up multi user mode QuickBooks?
Answer – Clean install means you have to uninstall QuickBooks and then install it again properly and completely from a trusted source in order to resolve any bugs or glitches. Therefore, you can perform a clean install if any error occurs while setting up multi user mode QuickBooks.