

QuickBooks is undoubtedly one of the best accounting software at present. It is the answer to all your accounting woes. However, just like any other software it has its own operational challenges and errors. If you are a user of QuickBooks and you are facing any such issue you don’t need to worry. You will find answers to all the QuickBooks-related errors and queries here. In this article, we will be resolving the issue of QuickBooks Audit Trail Removal, which has been bothering many QB users for a while now.
We have received ample requests demanding a solution for this issue. We did our work and finally devised a working method to remove the audit trail from QuickBooks. But, before we jump on to any working ways to remove the audit trail, it is important that you understand a bit about it.

What Is QuickBooks Audit Trail?
The Audit Trail is a QuickBooks feature. It enables you to keep a track of and manage all the reports that have been deleted, edited, modified, or are newly added transactions in your account. Using the Audit Trail feature, you can also track any lost transaction of your QuickBooks Desktop account. This feature serves as a life savior for many as if it is turned on or enabled in your QuickBooks account it can provide you the previous transaction that is no longer available in your account.
Methods To Find & Remove/Delete QuickBooks Audit Trail
Here are steps to find and remove or delete audit trail in QuickBooks.
How To Find An QuickBooks Audit Trail?
Finding a QuickBooks online audit trail is not a tough task. There are certain steps that you need to follow to locate and access it. Below are the steps that you need to follow to open the QuickBooks desktop audit trail:-
- Launch the QuickBooks Desktop software from your desktop.
- Then go to the ‘Edit menu’ and select the ‘Preference’ option.
- Once you click on the preferred option, a preference window will open.
- Next, You will have to provide an indication suggesting that you want to ‘alter the preferences for the accounting of your company’s data files.’
- Now, to do so, you will have to navigate to the icon bar. It is located at the left corner of the preference dialogue box. Go ahead and choose the set of preferences related to the accounting.
- Further, tap on the option indicating ‘Company Preferences’.
- Next, provide an indication suggesting that you are willing to utilize the audit trail.
- To do so, all you have to do is, put a ‘Tick’ in the option “Use Audit Trail” in the current ‘company preference’ window & click the ‘OK’ button.
- Next, close all the windows and restart the QuickBooks Desktop software, so that it registers all the modifications and changes made in the preference option by the user.
- Bingo! Now you must be able to access the audit trail data from your QuickBooks. You can always edit and customize your reports as needed. A user can always change the fonts, display type, and even resize their reports.
How To Erase/Delete An Audit Trail QuickBooks?
- Launch the QuickBooks Desktops software on your PC
The first step that you have to follow is to open the QuickBooks desktop software. Then, navigate to the File menu located at the top left corner of the software window.
- Locate Utility Option
You will find utilities option in the dropdown menu and select it
- Choose the menu option accordingly
Now you will get 2 options; the clean-up company data and the condense data option. You will have to select either of the options depending on the version of QuickBooks you are using. The reason behind this is because some versions of the QuickBooks clean-up data are written as condensed data.

- Choose the data range
Next, you will have to choose the range of data. You will have to select from when you want your data to be cleared. Alternatively, you can choose to use the delete all transaction option.
- Tick mark on all the check box
In the next step, you will have to tick all the check-box, that you get on the instruction screen. This is the way through which you can delete /erase the audit trail for all accounts and transactions.
- Begin the clean up
Lastly, press the begin cleanup process to remove the selected data and finish the process.
Issues Related To Using Audit Trails
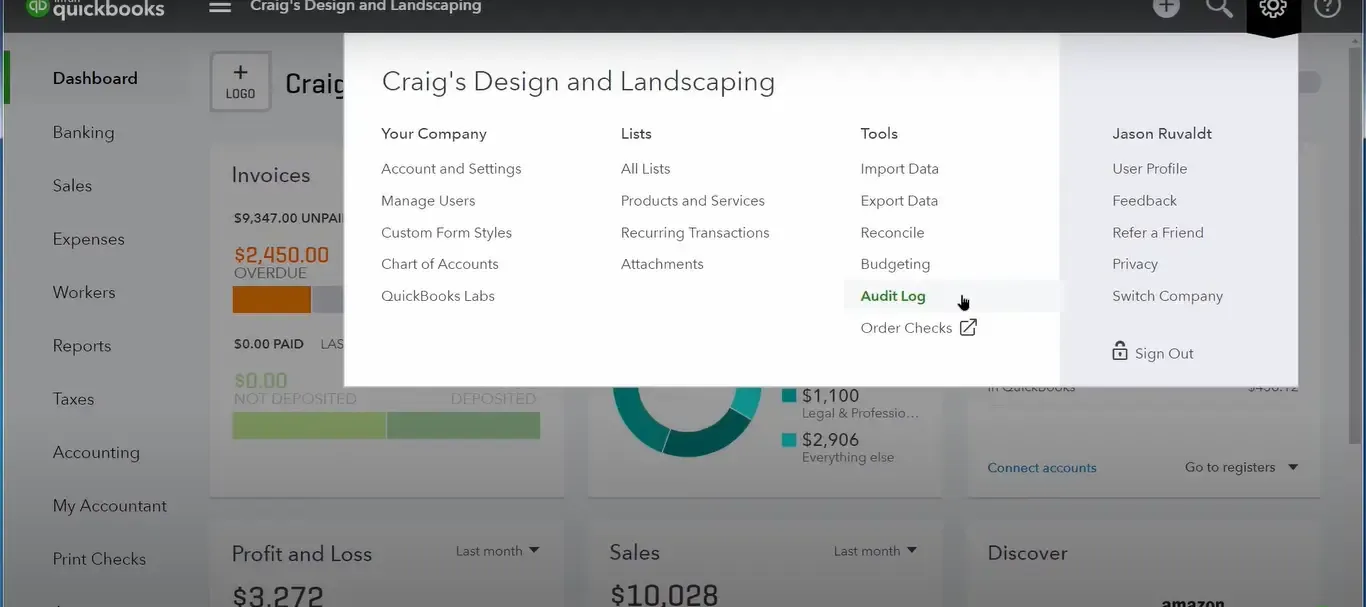
At times, the functionality of audit logs is not accessible and works poorly for many users. It becomes difficult for users to locate the history of some specific transactions. By clicking on the gear icon present and selecting the ‘audit log’ option available in the Tools section of the software, you can see the changes in the Log.
In case if you need the history of a particular transaction, follow the steps provided below:
- First and foremost, open the transaction that you wish to examine
- Next, locate the ‘more button at the bottom of the window
- Now, select the Audit History option
- A detailed audit trail of the transaction can be viewed through the audit history functionality
- If you want to see the details, you can click on the ‘show all’ button, and by choosing compare you can easily do the comparisons.
Locating Audit trail in different version of QuickBooks (Pro, Premier, Enterprise, Desktop & Online)
For locating audit trail in Desktop, Pro, Premier, and Enterprise versions of QuickBooks follow these steps
- Within the QuickBooks Desktop
- Locate the report menu options and click on it
- After that, choose the accountant and Taxes option
- Next, you have to click on the audit trail.
For Locating Audit Trail In Online Version:
- Launch QuickBooks Online
- On the top right side of the QuickBooks Online window, click on the gear icon.
- The Audit Log option will be available in the drop-down menu
How To Disable QuickBooks Audit Trail Software?
Once you have enabled the audit trail in QuickBooks, you cannot disable it simply. So, if you want to disable the QuickBooks audit trail, you will have to reach out to the helpdesk of QuickBooks. Once you are in contact with someone from the QuickBooks helpdesk, ask them to turn it off for you as you don’t wanna use it. (This is the only effective and working method to turn off the audit trail in the QuickBooks)
How To Use Audit Trails For Multiple Users Access?
Sometimes QuickBooks Multi-User Mode Not Working error occurs. To use the audit trail for multiple users in the QuickBooks you will have to enable the audit trail option. This will allow you to data file multiple users’ access. The audit trail allows you to monitor and keep a tab on all the ongoing and past modifications that have been made in the QuickBooks data file. This feature is very beneficial when multiple users are maintaining a company file.
Here are the steps that you must follow to enable the QuickBooks Audit trail:
- Choose Edit menu and select preference from the menu bar
- Once you click on the option as suggested, a preference window will appear
- Specify that you would like to adjust one of the company’s accounting preferences
Here are the instructions that you need to follow to modify an accounting preference:
- The first step is to navigate to the top left and use the icon bar placed at the left edge of the dialog box that says preferences
- Your accounting preferences will be accessible through this interface
- Once you’ve completed the above step, navigate to the Company Preferences option and click on it
- It is important to determine that you require access to the audit trail. In order to do so, go ahead and select the checkbox which depicts ‘Audit Trail’
- Press the OK button. Now you will be able to keep access to all the records present of the various alterations of the QuickBooks.

Steps To Check The Transaction Modification Done In The Audit Trail Section Of QB
Here are the steps that you need to follow view all the changes that have been made in the audit trail:
- Locate the recurring transaction menu in QuickBooks
- Once located, you can use this menu option to add, edit and perform modifications in the recurring transaction if required
- If you wish to view the record based on a specific date, then you can discover the audit history
Here is the information that can be monitored in the audit history:
- Name of the person who had accessed the report and made changes to it
- The time when the change was made and the components that were changed in the report
- It is important to ensure that the right to see the audit history is entitled to you
- Go to the desired transaction you want to discover
- Locate the more button and click on it
- Next, select audit history
- Once you press the audit history option it will open the Audit trail
- Now if you wish to see more, you will have to choose the show all options and click on the compare button
Now, if you are facing troubles using the Audit log in QuickBooks, then you will have to follow the steps that we have mentioned in the next section. It is important that you carefully understand this and keep on following the steps side-by-side in the software.
How To Use QuickBooks Audit Log?
The first thing that you need to do is sign in as the admin. In simple terms, your software must be logged in the admin mode so that you have full access to it.
Once You Have Done Logged In As Admin, Follow These Steps:
- Locate the settings option in the menu bar
- Further, choose the Audit log
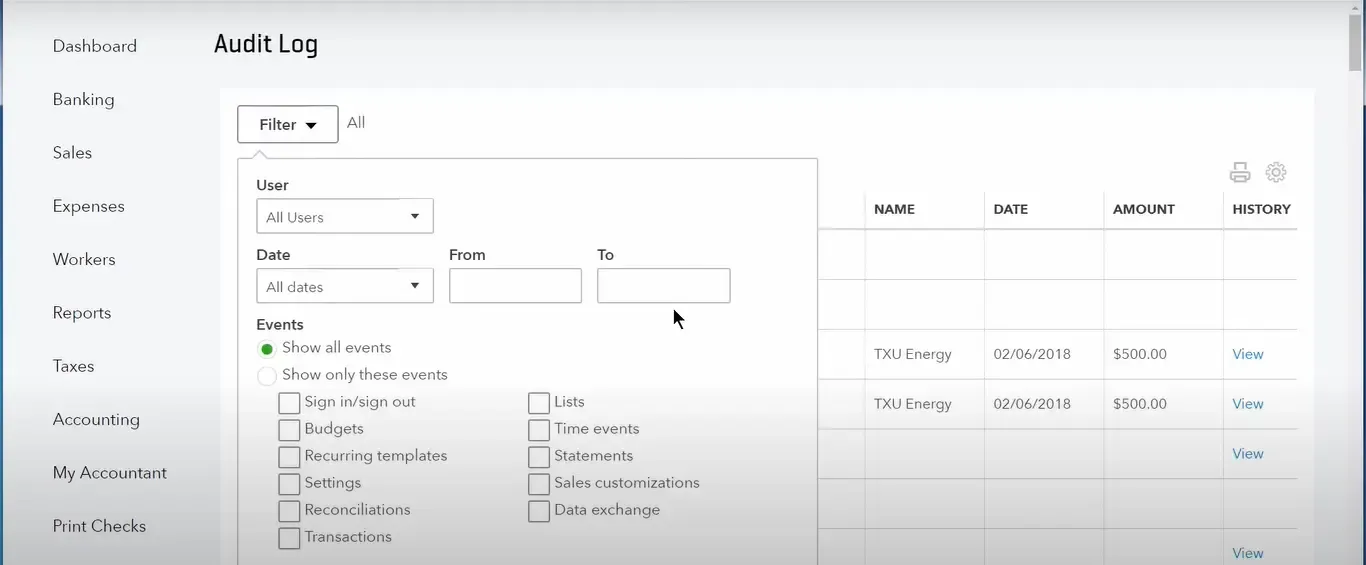
- Then click on the filter
- Then, you have to locate the filter panel. This will allow you to use different fields which will allow you to select the suitable user, date, or events filter to view the outcomes.
- Next click on apply button
The Things That You Need To Know Related To Audit Log
You will be able to as many as 150 records in the audit log in one go. In case if you wish to check records from the past then you will have to check the view setting. These settings options can be accessed in the History column to display the audit history.
You can access all the modifications that you have done in the past.
How Can You Find Audit Reports In QuickBooks?
It is important to understand that the audit report is not the same as the Transaction history report. There is a detailed log linked to the audit report.
However, if you are a user of QuickBooks desktop the you will need to follow the steps written below to gain access of the audit log report:
- Find the reports option
- Choose the accountant and Taxes button in the aforementioned option
- Click Audit Trail
If you are a QuickBooks Online user, then follow these steps:
- Locate the gear icon
- Locate the audit log and click on it
Details About The Tabs Available In Audit Trail Window
When you navigate to the audit trail window, you will find as many as four tabs inside it. These four windows are
- Display
- Filters
- Header/Footer
- Fonts & Numbers
Let’s Discuss In Detail About These Four Tabs:

Display:
When you click on the Display tab in the audit trail window, you can access the data range, days. Moreover, you can also access the date when the transaction was changed and entered. Also, you can adjust and set the column that displays on the report.
Filter:
You can use this tab in the audit trail window to filter out the audit report of a similar type, value, amount, or function. This helps you to segregate the audit report of your need from the cluster of all the reports.
To apply a filter in the audit trail menu you will have to choose the required options for filtering the audit log. You will have to apply these filters setting the right corner of the filter tab. However, if you wish to delete a filter, then left-click on it and choose to remove the selected filter.
Header/Footer:
You can use this option to edit the content of the audit log present on the header and footer of the report.
Fonts and Number option:
Using this tab you can modify the appearance of the audit report. Additionally, you can also change the settings of the default report. To make use of the option in this tab follow the steps below
- Locate the edit options and click on it
- Open preferences in it
- Click on reports and graphs
- Navigate To the company preference and click on it
- Click on the format
Read More: System Requirements For Desktop & Enterprise
Conclusion
We hope that we were able to provide in-depth information related to the QuickBooks Audit Trail Removal through this write-up. QuickBooks has been delivering all the needed accounting solutions to its users in the best possible way. But it is important that you are aware of all its functionalities.
Make sure to read our other articles for a better understanding of the QuickBooks software. However, if you are still unable to remove the audit trail from QuickBooks, you can reach out to Intuit. QuickBooks support for direct assistance.
It’s time we bid farewell and move on to digging up some more useful information to assist you in other QuickBooks-related issues. Make sure to put a comment in the box given below if you loved the article.
Frequently Asked Questions


