QuickBooks File Sharing: Share Company File Remotely
Call us for instant help – We are available 24*7

QuickBooks has a feature of a multi user-mode. In this mode, many users can access the same file at the same time. It enables users to work more productively and in a simple manner. It is much more time-saving than the QuickBooks single user mode. But many of the QuickBooks users do not know how to set up the QuickBooks multi user mode or how can they share QuickBooks company file over network. This article is a guide of QuickBooks file sharing and setting up the multi user QuickBooks. We have mentioned simple steps in which you can set up the multi user mode in QuickBooks .
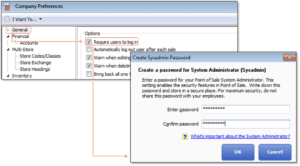
What is Company File in QuickBooks?
A company file is the main file that holds all the account data of your company. All the other files or folders like payments, transactions, payrolls, etc are contained inside a company file. So it becomes very important to protect the company file from any kind of errors. To protect this file, you can use tools like QuickBooks tool hub, QuickBooks file doctor, QuickBooks diagnostic tool, etc. When you create a company file in QuickBooks, it is created with a .qbw extension.
Things you need before going for a multi-user setup
You need the following mentioned things present before you can opt for the multi user mode.
- You need to keep in mind that all the users you are going to add in the multi user mode, are required to first set up the user mode in their systems.
- The second thing that you need to check is that all the permissions are granted that are necessary for move QuickBooks company file.
- The last thing is database access. Check your database settings and start the database server manager.
Ways to Setup the Multi user Mode to share Company Files in QuickBooks
Switch to the multi user mode
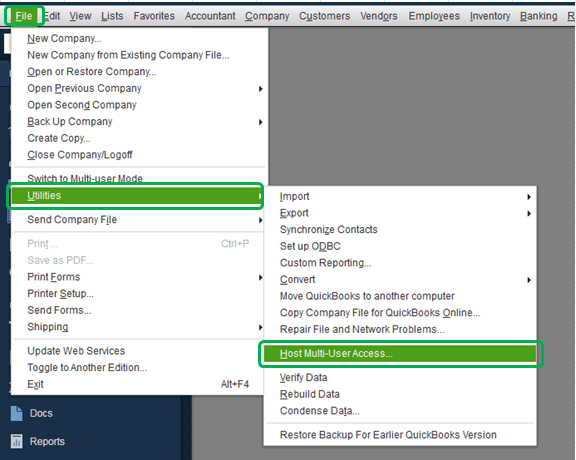
- Go to your QuickBooks software and open it.
- If you have an outdated version of QuickBooks, first install the latest one.
- Once installed. open the software and go to the file option.
- There you will see a utility option, there you will get an option to host in multi-user mode.
- Click on that option and it will start your multi-user setup.
Update your folder permissions to share company files in QuickBooks
- Look for the folder where your QuickBooks company file is present.
- Next, you will have to go to the details of the folder.
- Look for the security option and click on it.
- You will then see a list of options in which you will be able to edit the security details. Add the QuickBooks service and provide full access.
- Save the settings that you have made.
- The next thing that you have to do is to grant access to windows to share files in QuickBooks.
- Now, you will have to go to the file explorer.
- In the file explorer, you will be required to look for the folder where your company file is present.
- Once you have found the folder, you will be required to go to the share option and add a new share.
- In that option, you will have to look for the QuickBooks service and select it.
- Once this is all done, you will be required to click on the option to grant full access to the folder.
Update the security settings for your system
- Firstly, go to your firewall settings.
- In the setting, look for the advance setting option and click on it.
- After that, look for the inbound rule option, where you will have to add a new rule and edit the port section.
- In the port section, choose the TCP connection option and enter the port that is used for the version of QuickBooks that you have.
- Allow it to build a connection.
- The next thing is that you will have to grant permission to every user by selecting all of them.
- Save your changes and close the firewall settings.
- After this is all done, you will be required to restart your system and open your QuickBooks software in a multi-user mode.
Update the windows admin rights to share files in QuickBooks
If you are using Windows 10, follow the below-mentioned steps.
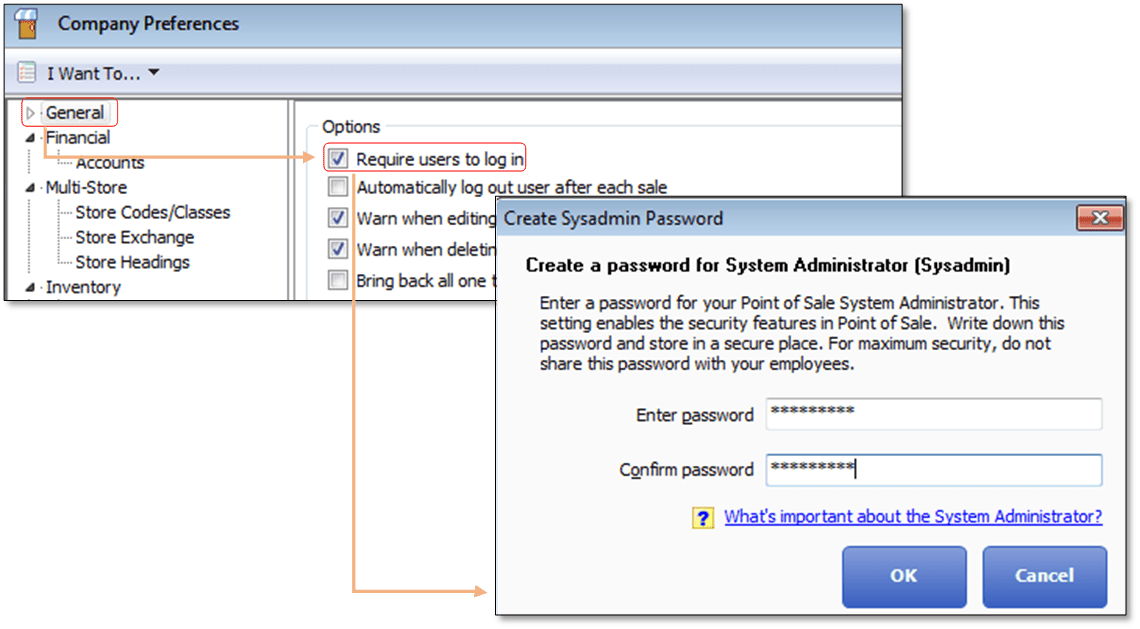
- The first thing that you have to do is to go to the accounts section of the system and add a member there.
- You will have to select the option to add a member.
- After this, you will be required to select the option to add members without their signature. You will get this option in the end.
- You will have to next enter a username and password for the particular member you have added.
- You will have to grant access to the new user.
- Next, you will be required to mark the new member as an admin and save the changes.
- Once the process is done, restart your system.
If you are using Windows 8 or 7, follow the below-mentioned steps.
- The first thing that you need to do is to open the control panel on your system.
- Next, you will have to go to the account section and create a new user there.
- Once this is done, you will be required to enter a name for the user you have just created.
- Assign the new user admin rights.
- Save your settings.
Read more - How to resolve QuickBooks multi user mode not working?Use the remote method
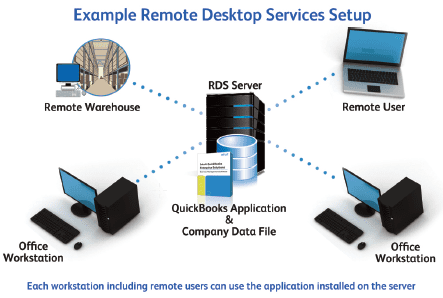
- For this, you will have to go to the QuickBooks software and switch your account to the multi-user mode.
- Confirm for the same.
- After this, you will have to add all the users that you want to add.
- For this, you will have to go to the company option and then to the user option. There you will be able to see the option to add a user.
- Enter the details of the user and save it.
Conclusion:
Frequently Asked Questions (FAQs)
Q.1 – How to use QuickBooks file doctor for setting up file sharing?
QuickBooks File Doctor can be used to set up file sharing, which is necessary if you want to use QuickBooks in a multi-user environment. To use QuickBooks file doctor for setting up file sharing, simply follow these steps:
- Download and install QuickBooks file doctor on each computer that will be accessing the QuickBooks company file.
- Run the QuickBooks file doctor on the computer that will host the QuickBooks company file.
- Select the option to “set up file sharing.” This will allow other computers to access the company file over the network.
- Follow the prompts to complete the setup process. Once complete, you should be able to access the QuickBooks company file from any computer on the network.
Q.2 – How to move my QuickBooks file to a new server for sharing?
- Navigate to the File menu on the old computer.
- Then choose Move QuickBooks to another computer under Utilities.
- Choose I’m ready and enter your one-time password.
- Make sure you follow the on-screen instructions for copying the file to your flash drive.
- Insert the flash drive in your new PC.
- Move to the list & open the file Move_QuickBooks.bat for the migrator.
- Type up the password & tap on Let’s go.
Q.3 – Why to use QuickBooks file sharing on the cloud?
QuickBooks file sharing on the cloud allows businesses to share financial data with accountants, bookkeepers, and other team members easily and securely. QuickBooks offers a secure login process that uses two-factor authentication and encrypted data transfer to protect your information.
QuickBooks automatically backs up your data on the cloud so you can access it from anywhere. QuickBooks file sharing on the cloud is a convenient and secure way to share financial information with others.
Q.4 – Can QuickBooks be shared on a network?
Yes. One of the most popular features of QuickBooks is its ability to be installed on multiple computers and accessed over a network. This allows businesses to have multiple users connected to the same QuickBooks file at the same time. This can be a great convenience for businesses that have employees working in different locations. It also allows businesses to maintain a central QuickBooks file that can be easily accessed by all authorized users.
Q.5 – How do I use QuickBooks remotely?
There are 3 ways through which you can use QuickBooks remotely.
- QuickBooks Online
- QuickBooks via Remote Access Tool
- QuickBooks Cloud Hosting

